
Okay yall. I found such a neat paper rose idea from little birdie secrets. In order to wind down from the daily conversations between me and my 5-year-old friend of what happened on hannah montana, or how 'root beard' tastes really bad, or how why we LOVE 'chip-fil-a', or even having to explain why you won't get birthday presents after you die, I decided to try my hand at these. egh. They are really neat to make so I took pictures to make an easy how-to, if you will. Try it. Today. Super easy. Do it.

I have a tendency of impatient scrolling to see the end result of a blog post. at times. So I just put the last picture at the beginning so anyone else who does the same as I do, well here you go. No need to scroll friends.

Seriously, all you need are the following:
-Scrap book paper....I used left over pages from a book I had used for a design project
-Glue
-Scissors
-Hole punch
-Skewer type tool....I just used the end of a long, skinny paint brush
-Sonic drink (optional)
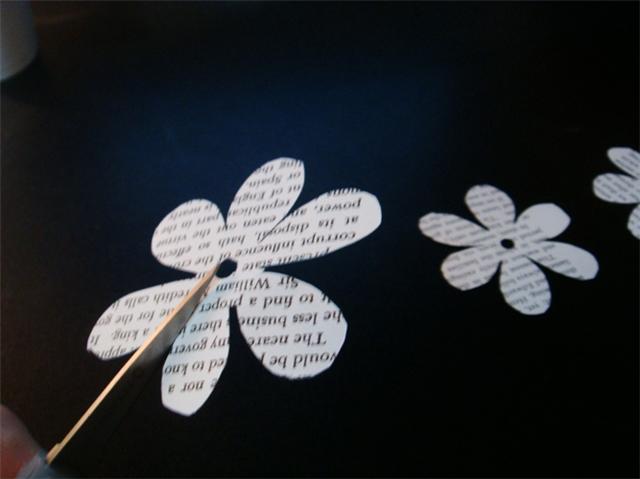
 Cut out three, six-petaled flowers from the paper.
Now, if you have a punch that will do it for you, great. If you don't, then just cut them out with your bare hands (mine, as you can see, are terribly messy. I think its a little funky. I like it).
Oh, and hole punch them.
 Take the first flower and make ONE cut in between two petals towards the middle of the flower. Sit it down.
 With the second flower, make a cut to both sides of one petal as seen above.
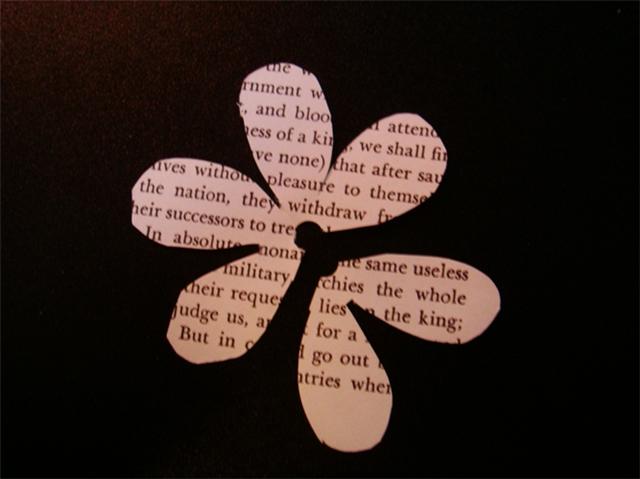 With the third, cut off two petals, but make sure they stay together. Meaning, don't cut them separately.
Okay. So now you should have a flower with 6 petals (with one cut). Another with 5 petals. Another with 4 petals. Another with 2 petals. And a single petal all to its lonesome.
 Now, pick up that first flower that has just one cut. Put some glue on one of the petals next to the cut. Then take the petal from the other side of the cut and glue those two together.
  Now pick up that second flower. Put a little glue on the edge, like so.
 Then, do the same as you did with the first flower and fold the other petal (from the other side of the cut) and glue them together. Hold it tight with your fingers for a minute so it'll stay.
 Oops. I didn't take a picture of the third flower that should now have four petals on it. You can do it. Pick that up and glue the two petals together. This will make it look like a three-petaled flower.
 Now here's where trickiness arrives and pictures come in handy. Grab that long skewer-paint brush utensil and curl the two-petaled flower around it. Just the two edges. Curl them inward.
WARNING: Please disregard the nastiness that is my fingernails. I have not payed any attention to them until now. ugh. gross. please. I know.
I know.
 Other side.
 Glue the two edges together.
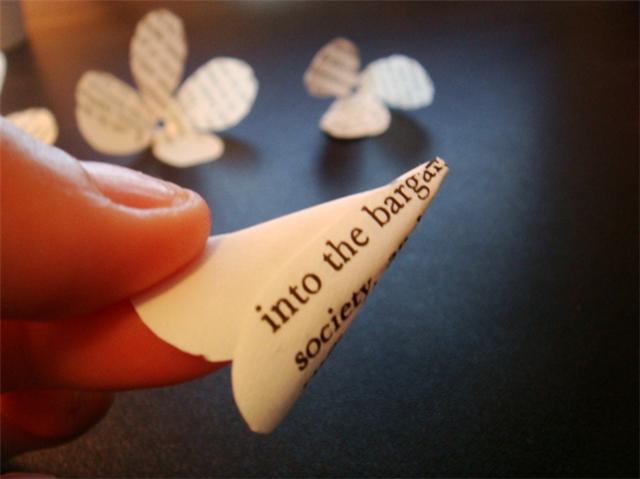 Now it should look somewhat like this.
 Now curl the one petal all the way around the stick. no gluing.
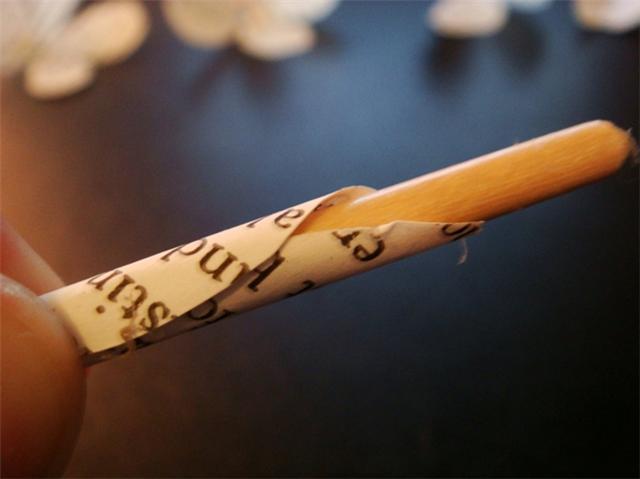
 Now, take each of the glued flowers and curl each of the edges out a little bit.
 You should end up with these.
 Now, take (what is now) the four-petaled flower and put glue on the bottom. Then place it inside the five-petaled flower. Sit that down and let it dry.
 Then take the two-petaled flower and the one petal. Place a small amount of glue on the bottom, outside of the one petal. Place it inside the two-petal flower and use the end of the skewer to glue them together.
 After the bigger flowers have had time to dry, place some glue on the outside of the three-petaled flower and place in inside.
 Almost done.
 Just take the little glued petals and glue them inside the bigger part of the flower. Feel free to use the skewer to push the petals down or closer to the other petals so they will stay together a little better.
 There it is. You can put them on anything. Just something pretty and easy to do it you're feeling crafty.
 If you choose to share, please respectfully link it back. thanks!
Love.

1 comment:
you are so stinkin' adorable. you never fail to bring a smile to my face :)
Post a Comment